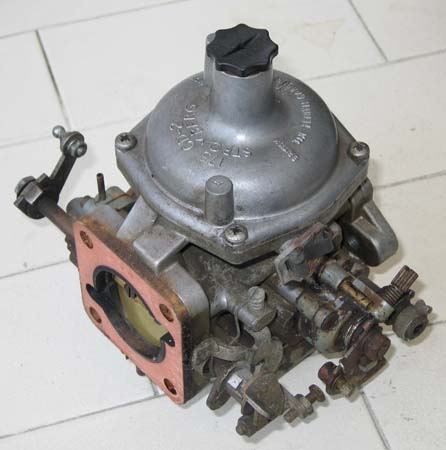
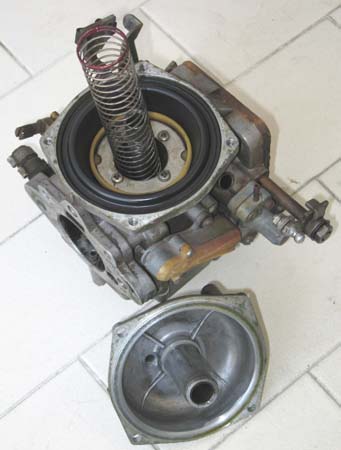
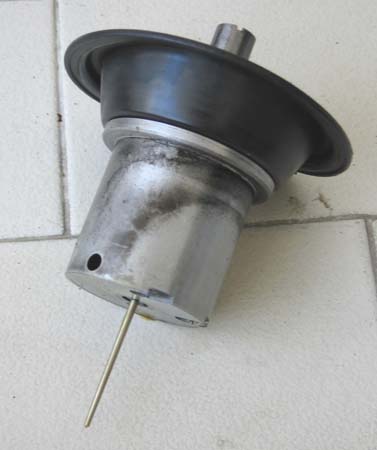
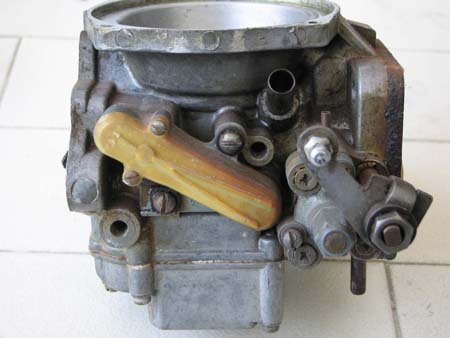
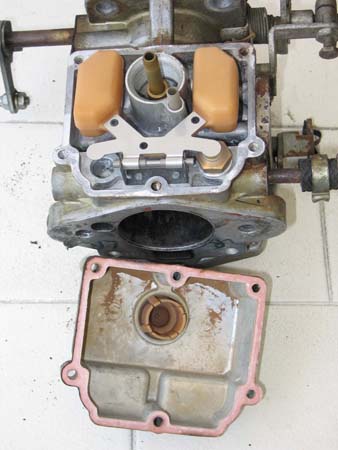
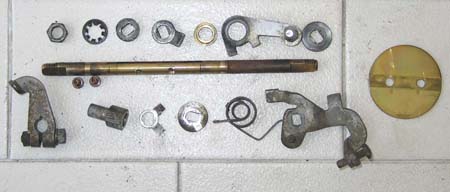
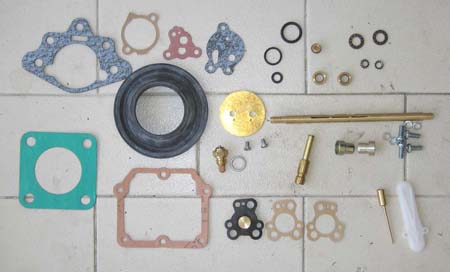
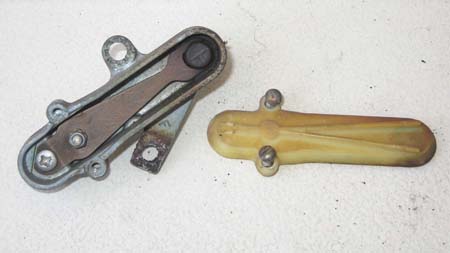
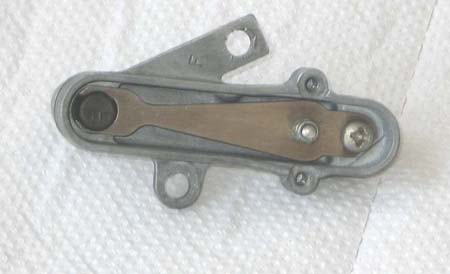
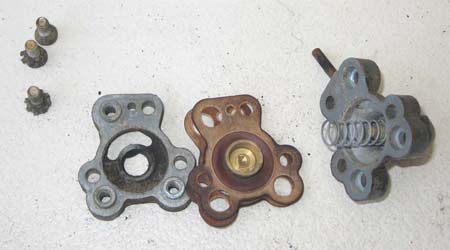
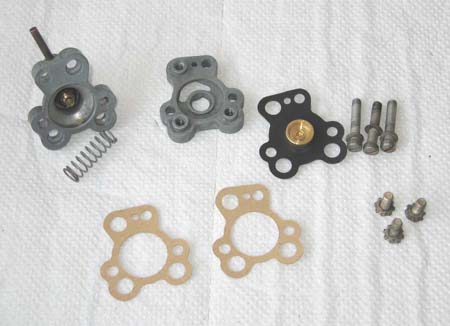
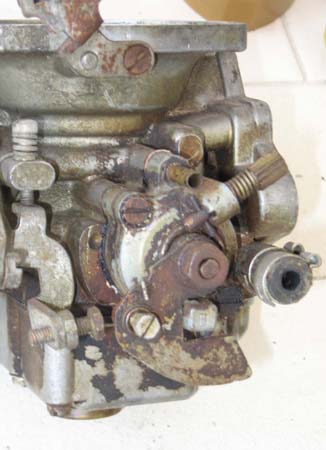
Carburettor Strip & Rebuild
|


Comments
| Carburettor Strip & RebuildAnonymous|25 Oct : 12:31 | |
| Guest Reply to this | nice article, thanks for posting |
| Carburettor Strip & Rebuildcoachrugg@yahoo.com|21 Dec : 12:10 | |
| Guest Reply to this | Super, super job!! I have been told to diisable the bimetallic strip by fully tightening the nyloc nut and disabling the bypass valve by plugging the vacuum leads. The reason for this being that this was part of the emission system for U.S. cars and hurt performance. Needles replaced with the ones for Brotish sales and the egr breather blocked. Application: v12 xke. Please email me at above address for any comment. Thanks again. John Your article is so very good and complete. Excellent pictures and naration. I'm downloading this one to keep!! |
| Carburettor Strip & Rebuild230_sl|14 Jan : 19:10 | |
| Guest Reply to this | Excelent job! Unique on the web Marco, Italy |
| Carburettor Strip & RebuildAndre Cassis|16 Jul : 10:23 | |
| Guest Reply to this | Hello my friend. I have a problem after my mechanic rebuilt all four Strombergs,the linkage seems to stick and causes the throttle to stick.Inbetween shifts the throttle pedal has to be blipped to bring down the rpms from 3,000 and proceed to the next shift. At idle the throttle causes a fast idle and pedal must be blipped to reduce same. Any ideas or comments would be appreciated....otherwise the engine sounds great and idles great.To reply please use acassis©polarisrealty.com. Thanks, Andre Cassis in Montreal,Quebec |
| |||||
| Carburettor Strip & RebuildAD|01 Feb : 03:07 | |
| Guest Reply to this | Hi, This is excellent, but I am not too handy myself and have always had my mechanic do most of the work. However, he retired recently and his replacement has rebuilt my carburetors. Now, if I don't drive the car for a few weeks, the car spews petrol on the ground. The new guy says it is the quality of the petrol available here in Los Angeles. Apparently the needle gets sticky when the gas is left sitting in the carburetor. apart from returning to the mechanic each time, is there something that I can do to prevent the sticking? |
| Carburettor Strip & RebuildFlyer 295|23 Apr : 16:16 | |
| Guest Reply to this | I have a problem with an E type Jag. I can get the engine to run by spraying EasyStart or brake cleaner in to the all 4 air intakes with the butterflies open prior to starting. BUT it won't continue to run on the carbs. I'm impressed with your detailed carb item and wondered if you could tell me why ALL these 4 carbs will not work. There is suction at the air intake but only detectable by using a tissue across the opening. NO air leaks detectable. Bob Hitchin |
| Carburettor Strip & RebuildClassic Petrolheads|01 May : 05:58 | |
| Guest Reply to this | I have what I think is a unique problem. I've been working on a customer's E Type Series 1.5 and the Strombergs appear to be a mish mash of various carbs. I say this because I cannot find any kind of adjustment for the needles. The carb dashpots say CD2 175 but after extensive research I found the bodies to be CDSE. So, the jets are the fixed type but there is no adjustment on the needle side. The needles are set into a blind hole and are held in place with a blunt tipped screw. No access from above as the damper chamber is also blind. I have ploughed the internet and have not been able to find anything like it. Could it be that some previous guy has fitted pistons from an adjustable jet carb to CDSE bodies? If anyone can throw any light on this you will have my eternal gratitude. |
| Carburettor Strip & Rebuildgiovanni rome zenith stromberg 175 c2 fixed needle|20 May : 03:51 | |
| Guest Reply to this | fixed needle as I can replace it with an unusable adjustment key on the fixed needle type many thanks |
| Carburettor Strip & Rebuild04oldsmobile|23 May : 10:22 | |
| Guest Reply to this | Hi there, i need help after rebuilding the 4 carbs on a V12. The carbs all run beautifully but the butterflies wont return fully while the car is running at idle. When i turn the engine off they pop back that last mm. This is causing the throttle to feel sticky when first accelerating but ok after that. Again once back at idle its sticky to accelerate but as soon as the engine is switched off the throttle is perfectly free. Its not the linkage as ive disconnected that and the same problem is there. Its like its a vacuum issue holding them slightly open while running but they close when turned off. Has anyone got any idea what could cause this or had the same problem ? Please e mail me at david.wilkens©bristols.co.nz Any help would be much appreciated. |
| Etype S3 1974I need to find either used or new airfilter box s|09 Oct : 11:13 | |
| Guest Reply to this | hi I’m looking for both left and right Air filter boxes For a Jaguar Etype v12 s3 Can you either assist or recommend someone who has a couple? |
| Carburettor Strip & RebuildHammerman |12 Oct : 09:29 | |
| Guest Reply to this | Regarding CD 175 Stromberg. There is an air vent column running parallel to the neck on the dashpot cover. Dashpot falls freely with metallic click. After screwing in the damper Screw there seems to be a vacuum effect where the dashpot falls slowly without click or fully closing. When running car rough idle and gas smell at red lights. Dashpot not fully dropping. Dashpot screw is straight and clean. Dashpot stem the same. Switched dashpot screw from working carbs with no change. Have to think the vent column is clogged stopping venting but it seems clean and open on a blow test. Help |
Submit comment
